
Hair Weave Extensions, sew in hair extensions
Everything You Need To Know About Sew-In With Closure

The 60-Second Answer
A sew in with closure is a protective weave style where hair bundles are sewn onto a braided foundation and finished with a lace closure at the crown. The closure creates a natural scalp illusion, protects your leave-out, and gives you a polished look with less daily heat styling and lower maintenance.
A Closure Sew-In Protects Natural Hair

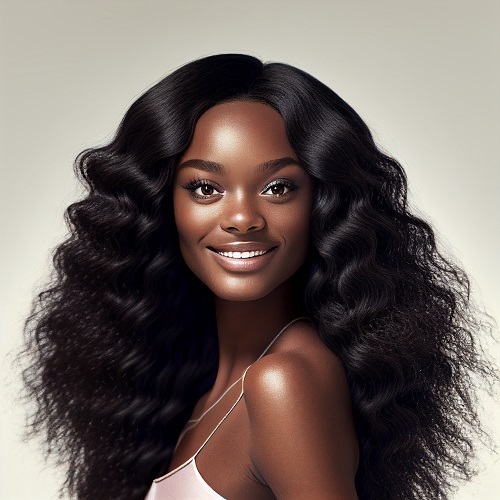
A sew-in with closure is a hair weave style where your natural hair is braided down, and hair tracks are sewn onto the cornrow base using a curved needle and nylon weaving thread. A lace closure is then sewn near the crown or parting area to cover the top of the install.
Closures typically cover a smaller area, such as 4×4 inches, 5×5 inches, or 6×6 inches. They can be middle part closures, free part closures, or three-part closures, depending on how you want to style your hair.
A closure sew-in is considered a protective style because your natural hair is tucked away underneath the install. This helps limit heat styling, reduce manipulation, and protect fragile ends when the style is installed and maintained correctly.
ATTENTION: Turn Your Passion For Hair Into Profit ⬇️⬇️⬇️

Lace Closures Create A Scalp Illusion

A lace closure sew-in uses a lace closure piece to make the top of the weave look like a natural scalp. The closure can be customized with bleached knots, lace tint, a plucked hairline, baby hairs, and a clean parting space.
Bleaching the knots helps the hair appear as if it is growing from your scalp. Plucking the parting line makes the closure look less dense and more natural. HD lace is often preferred because it can create an undetectable finish when matched properly to the skin.
How Does A Sew-In With Closure Work?
A sew-in with closure works by creating a secure braid foundation first. The stylist braids the natural hair into cornrows, using anchor braids and perimeter braids to support the install. A weaving net may be added for extra strength and a flatter base.
Next, the stylist sews the hair tracks onto the braids from the nape area upward. The closure is placed near the crown or front parting area and sewn down flat. A properly installed sew-in with closure should feel secure, not painfully tight.
From a scalp-health perspective, the braid foundation matters just as much as the closure itself. If the braids are too bulky, the install will not lay flat. If the braids are too tight, they may cause scalp irritation, hair breakage, or tension around the edges.
How To Choose The Right Weave And Closure For A Sew-In

When choosing hair for a sew-in with closure, you can use synthetic hair or human hair. Synthetic hair is usually cheaper, but it may not blend as naturally and cannot always handle heat styling. Heat-resistant fibers may allow light styling, but they still do not perform like real human hair.
Human hair bundles are best when you want a natural finish, reusable bundles, and styling flexibility. For best results, choose human hair bundles when you want to use a curling iron, flat iron, or blow dryer. A heat protectant should always be used before applying heat.
Popular textures include body wave, straight hair, deep wave, loose wave, kinky straight, yaki straight, and natural black hair. The best texture is the one that matches your style goals and blends well with your desired look.
Closure Size Changes The Look

A 4×4 closure is a classic choice for a simple middle or side part. A 5×5 closure gives more parting space and a fuller scalp illusion. A 6×6 closure gives the most room for styling while still being easier to maintain than a frontal.
If you want the most natural finish, an HD lace closure or Swiss lace closure may be the best option. Transparent lace can also work well when properly tinted to match your skin.
Sew-In With Closure Comparison Matrix
| Option | Coverage Area | Longevity | Styling Flexibility | Best For |
|---|---|---|---|---|
| 4×4 Closure Sew-In | Small Crown Area | 6–12 Weeks | Middle Or Side Part | Simple, Natural Looks |
| 5×5 Closure Sew-In | Wider Crown Area | 6–12 Weeks | More Parting Space | Fuller Scalp Illusion |
| 6×6 Closure Sew-In | Larger Crown Area | 6–12 Weeks | Most Closure Flexibility | Natural, Flat Installs |
| Frontal Sew-In | Ear-To-Ear Hairline | 4–8 Weeks | Ponytails And Hairline Styling | High-Styling Looks |
| Glue-In Weave | Track Placement Only | Shorter Wear | Limited Repositioning | Temporary Styles |
Sew-in weaves generally last longer than glue-in methods, making them a more durable option for hair extensions. Glue-ins are easier to install, but they usually do not hold as well and can be harder to remove without damaging natural hair. Sew-ins also give more styling flexibility because the tracks are stitched into a braid foundation instead of glued directly near the hair shaft.
How To Prepare Natural Hair For A Sew-In With Closure

In my professional experience, the flattest closure sew-ins start with clean, detangled, and properly moisturized natural hair. Before your install, wash your hair with a clarifying shampoo to remove product buildup, oil, and dirt from the scalp. Follow with a deep conditioner to restore moisture.
Trim split ends before your appointment. Healthy ends help prevent breakage while your natural hair is tucked away. Detangle with a wide-tooth comb from ends to roots, then blow-dry your hair gently so the stylist can create a smooth cornrow base.
A closure sew-in can support healthy hair habits when the natural hair is washed, conditioned, trimmed, and detangled before installation.
How To Sew In A Closure Weave Step By Step

Prep The Hair And Closure
Wash, condition, detangle, and stretch the natural hair. Prepare the closure by tinting the lace, bleaching knots if needed, and lightly plucking the parting space.
Create The Braid Foundation
Braid the natural hair into a flat cornrow base. The anchor braid and perimeter braid should be secure but not tight.
Place The Closure First
Position the lace closure at the crown or front parting area. Sew it down flat with a curved needle and weaving thread.
Sew In The Hair Tracks
Sew the wefted hair bundles onto the cornrows. Keep track placement neat and flat to prevent bumps.
Blend And Style
Set the part, trim uneven pieces, and style with light heat if using human hair. Use mousse or light holding spray for a natural finish.
Professional installation is recommended if the client is new to closures, lace placement, or sew-in techniques.
Wealthy Hair Maintenance Protocol

Wash your sew-in with closure every 7–10 days or as needed using a sulfate-free shampoo.
Condition the hair gently and avoid heavy product near the lace base.
Brush from the bottom to the top while holding the base of the closure to prevent tugging and shedding.
Use lightweight oil on the scalp only when needed to reduce dry scalp and itching.
Wrap hair at night with a silk scarf or satin bonnet to protect the closure and hair tracks.
Use heat protectant before heat styling and keep hot tools around 350°F when possible.
Book maintenance every two weeks and ask your stylist about tightening every four weeks if needed.
Do not leave a closure sew-in in longer than 2 to 3 months to avoid tangling, matting, and damage underneath.
Closure sew-ins typically last between six to twelve weeks, depending on maintenance and hair quality. The longevity depends on the quality of the hair, the skill of the stylist, the braid foundation, scalp care, and your natural hair growth rate.
Styling Options For A Closure Sew-In

Closure sew-in styles can be worn with side parts, middle parts, and soft flip-over looks, depending on the closure type and parting space. Popular styles include the Bobby Pin Baddie, Glam Hairband, Double Ponytail, Sassy Side Braid, and Halo Crown Braid.
You can also style a closure sew-in into Half High Buns, Space Buns, soft waves, sleek straight looks, or casual summer styles. Human hair closures usually offer better styling versatility than synthetic closures because they can handle controlled heat styling.
The Wealthy Hair Quality Standard
At Wealthy Hair, quality starts with sourcing and hair integrity. Our focus is on high-quality human hair extensions that look natural, feel soft, and support long-lasting installs. We value cuticle-aligned Remy hair, ethical sourcing, and careful quality control, so customers can choose hair bundles and closures with confidence. A high-quality closure sew-in is not just about length; it is about scalp comfort, hair protection, and a seamless blend.
Frequently Asked Questions
What Is A Sew-In With Closure?

A sew-in with closure is a weave style where hair bundles are sewn onto braids and finished with a lace closure. The closure covers the crown area and helps create a realistic part without leaving out much natural hair. Wealthy Hair recommends this option for clients who want a natural-looking protective style with less daily heat styling.
What Is A Lace Closure Sew-In?
A lace closure sew-in uses a lace closure piece to cover the top of the weave installation. The lace base creates a scalp illusion when the knots, lace tint, and parting space are customized correctly. Wealthy Hair offers quality closure options that help create a clean, polished finish.
How To Install A Lace Closure Sew-In?
To install a lace closure sew-in, start with clean hair, create a flat cornrow base, sew down the closure, then sew in the tracks. The technical key is keeping the closure flat and avoiding tight tension around the edges. Wealthy Hair suggests professional installation for the most natural and comfortable result.
Is A Sew-In With Closure Good For Natural Hair?
Yes, a sew-in with closure can be good for natural hair when installed and maintained correctly. It protects the hair from daily heat, styling stress, and constant manipulation. Wealthy Hair recommends clean prep, gentle braiding, and regular scalp care to support healthy hair underneath.
How Long Does A Lace Closure Sew-In Last?

A lace closure sew-in usually lasts six to twelve weeks with proper care. Hair quality, stylist skill, scalp care, and natural hair growth all affect how long the install stays neat. Wealthy Hair recommends maintenance every two weeks and removal by 2 to 3 months.
How Often Should You Wash A Sew-In With Closure?
You should wash a sew-in with closure every 7–10 days or when the scalp feels dirty or itchy. Washing helps remove sweat, oil, and product buildup that can irritate the scalp. Wealthy Hair recommends sulfate-free shampoo, gentle conditioning, and careful drying.
Can A Sew-In With Closure Look Natural?
Yes, a sew-in with closure can look very natural when the lace, closure size, and install technique are right. Bleached knots, lace tint, plucked parting, and a flat braid foundation help create a scalp-like finish. Wealthy Hair focuses on quality hair and closure choices for a seamless blend.
What Is The Difference Between A Closure And A Frontal Sew-In?
A closure covers a smaller area, usually the crown, while a frontal covers the full front hairline from ear to ear. Closures are usually easier to maintain, while frontals offer more hairline styling. Wealthy Hair recommends closures for clients who want a natural look with lower maintenance.
How Do You Protect Your Edges With A Sew-In Closure?
Protect your edges by avoiding tight braids, heavy pulling, and excessive edge control. Hair-care professionals often warn against excessive tension because it can contribute to breakage over time. Wealthy Hair recommends a secure but comfortable install that does not pull on the hairline.
What Causes A Lace Closure Sew-In To Lift?
A lace closure sew-in may lift because of loose stitching, product buildup, sweat, oil, or poor placement. The lace needs a clean base, secure sewing, and gentle maintenance to stay flat. Wealthy Hair recommends light products, nighttime wrapping, and regular maintenance appointments.

I’m a Caucasian woman. Can this be done on my hair? Also can the weave be a short style?
Yes, 100% you can. Our frontals are very natural looking.
Hi! I hve a question about this as i am getting my hair done soon and im getting sew in closure.
When washing the sew in would the front piece fall out while washing out or would it stay in?
Next question is, is the front piece closure sewn in or glued on thx bye!
Hi Abigail 🙂 You would just want to be gentle when washing it. As far as it being sewn it or glued you could do it either way. It just depends on how your stylist thinks is best which is normally depending if you have hair or not at the front of your scalp.