
Wealthy Hair Guides
Elevate Your Style: Expert Tips on How to Sew in Lace Closure Like a Pro


The 60-Second Answer
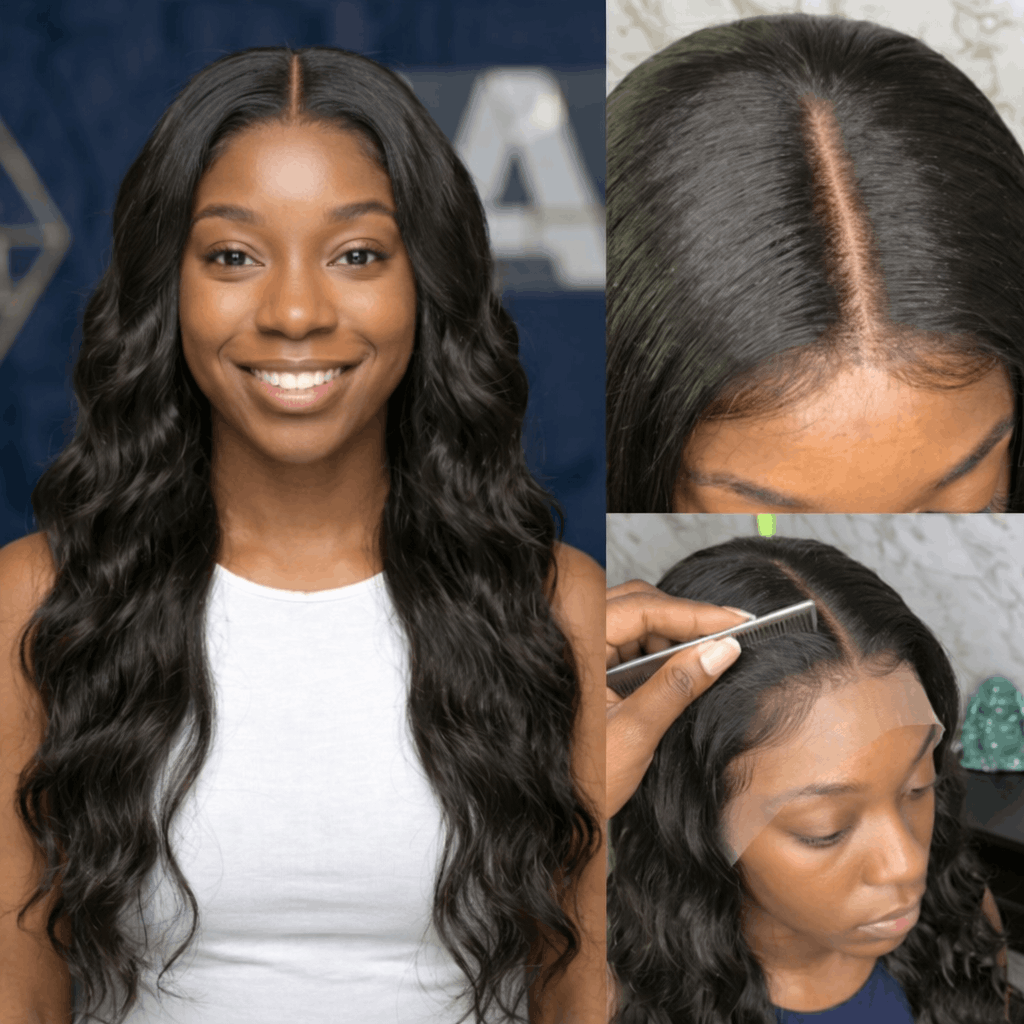
To learn how to sew in lace closure, braid the natural hair flat, place the closure where the part looks realistic, and secure it with a curved needle and strong thread. Keep each stitch neat but not too tight. After sewing, trim extra lace, blend the closure with your bundles, and style for a smooth, natural look.
What Is A Lace Closure Sew In?
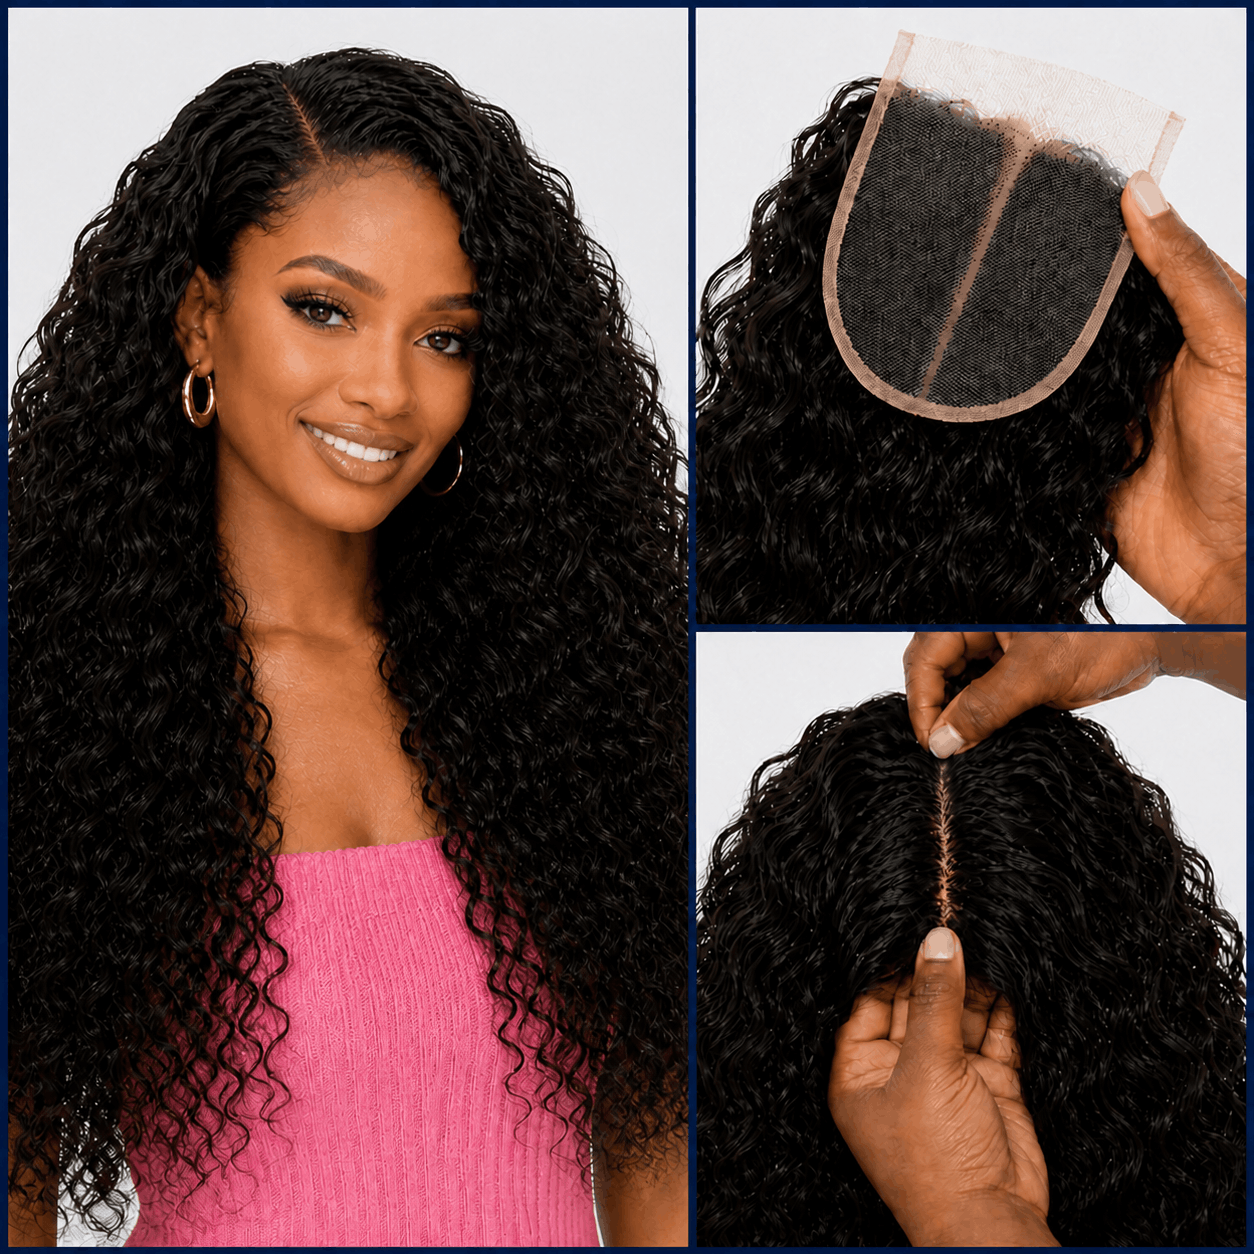
A lace closure sew in is a protective hairstyle where a lace closure is sewn onto a flat braided base, then blended with hair bundles. The closure covers the top part of the head and creates the look of a natural scalp, part, and hairline without leaving your real hair out. Closure sew ins are a popular form of protective styling and weave that use hair extensions to achieve a seamless look while protecting your own hair.
The beauty of a lace closure is simple: it gives you a polished style while helping protect your natural hair from daily heat, brushing, and styling stress. A well-installed closure should look smooth, feel comfortable, and sit flat without pulling your edges.
From a stylist’s perspective, the closure should never feel tight, pinchy, or painful. Tight styles can put stress on the hairline, and dermatology sources warn that repeated pulling from tight braids, cornrows, and extensions can lead to traction alopecia.
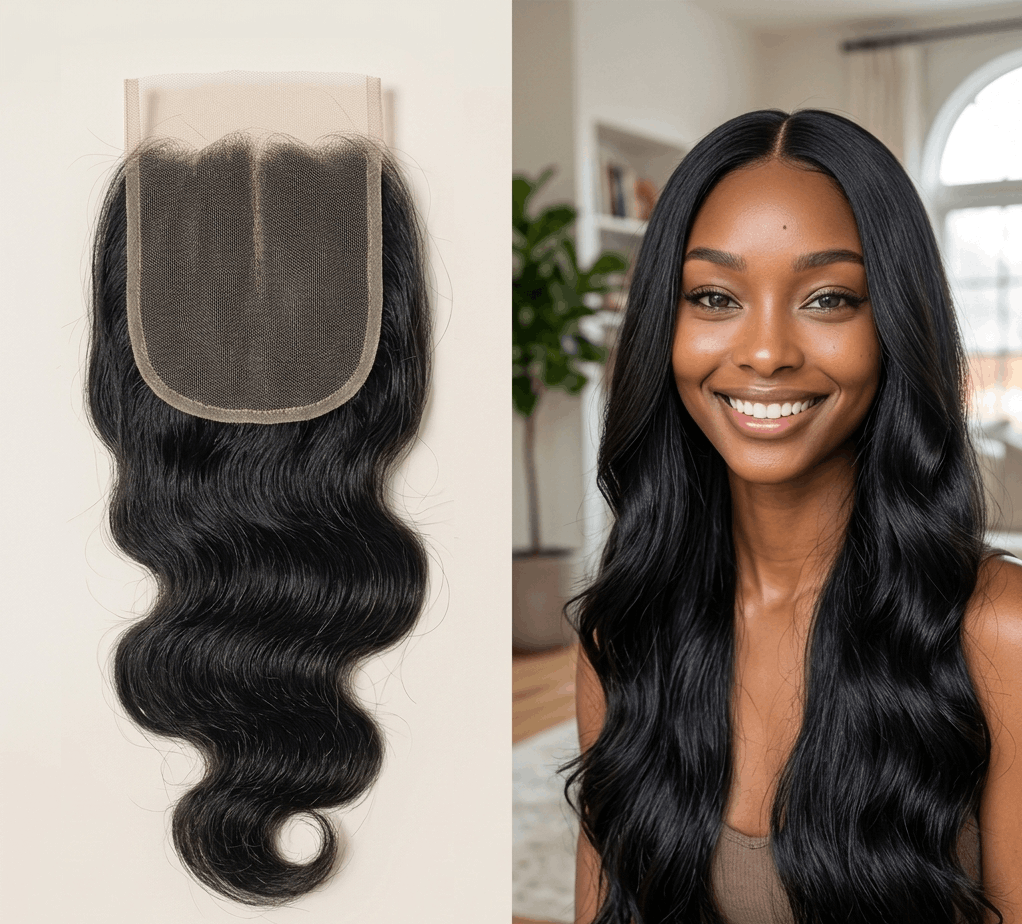
The Anatomy Of A Quality Lace Closure
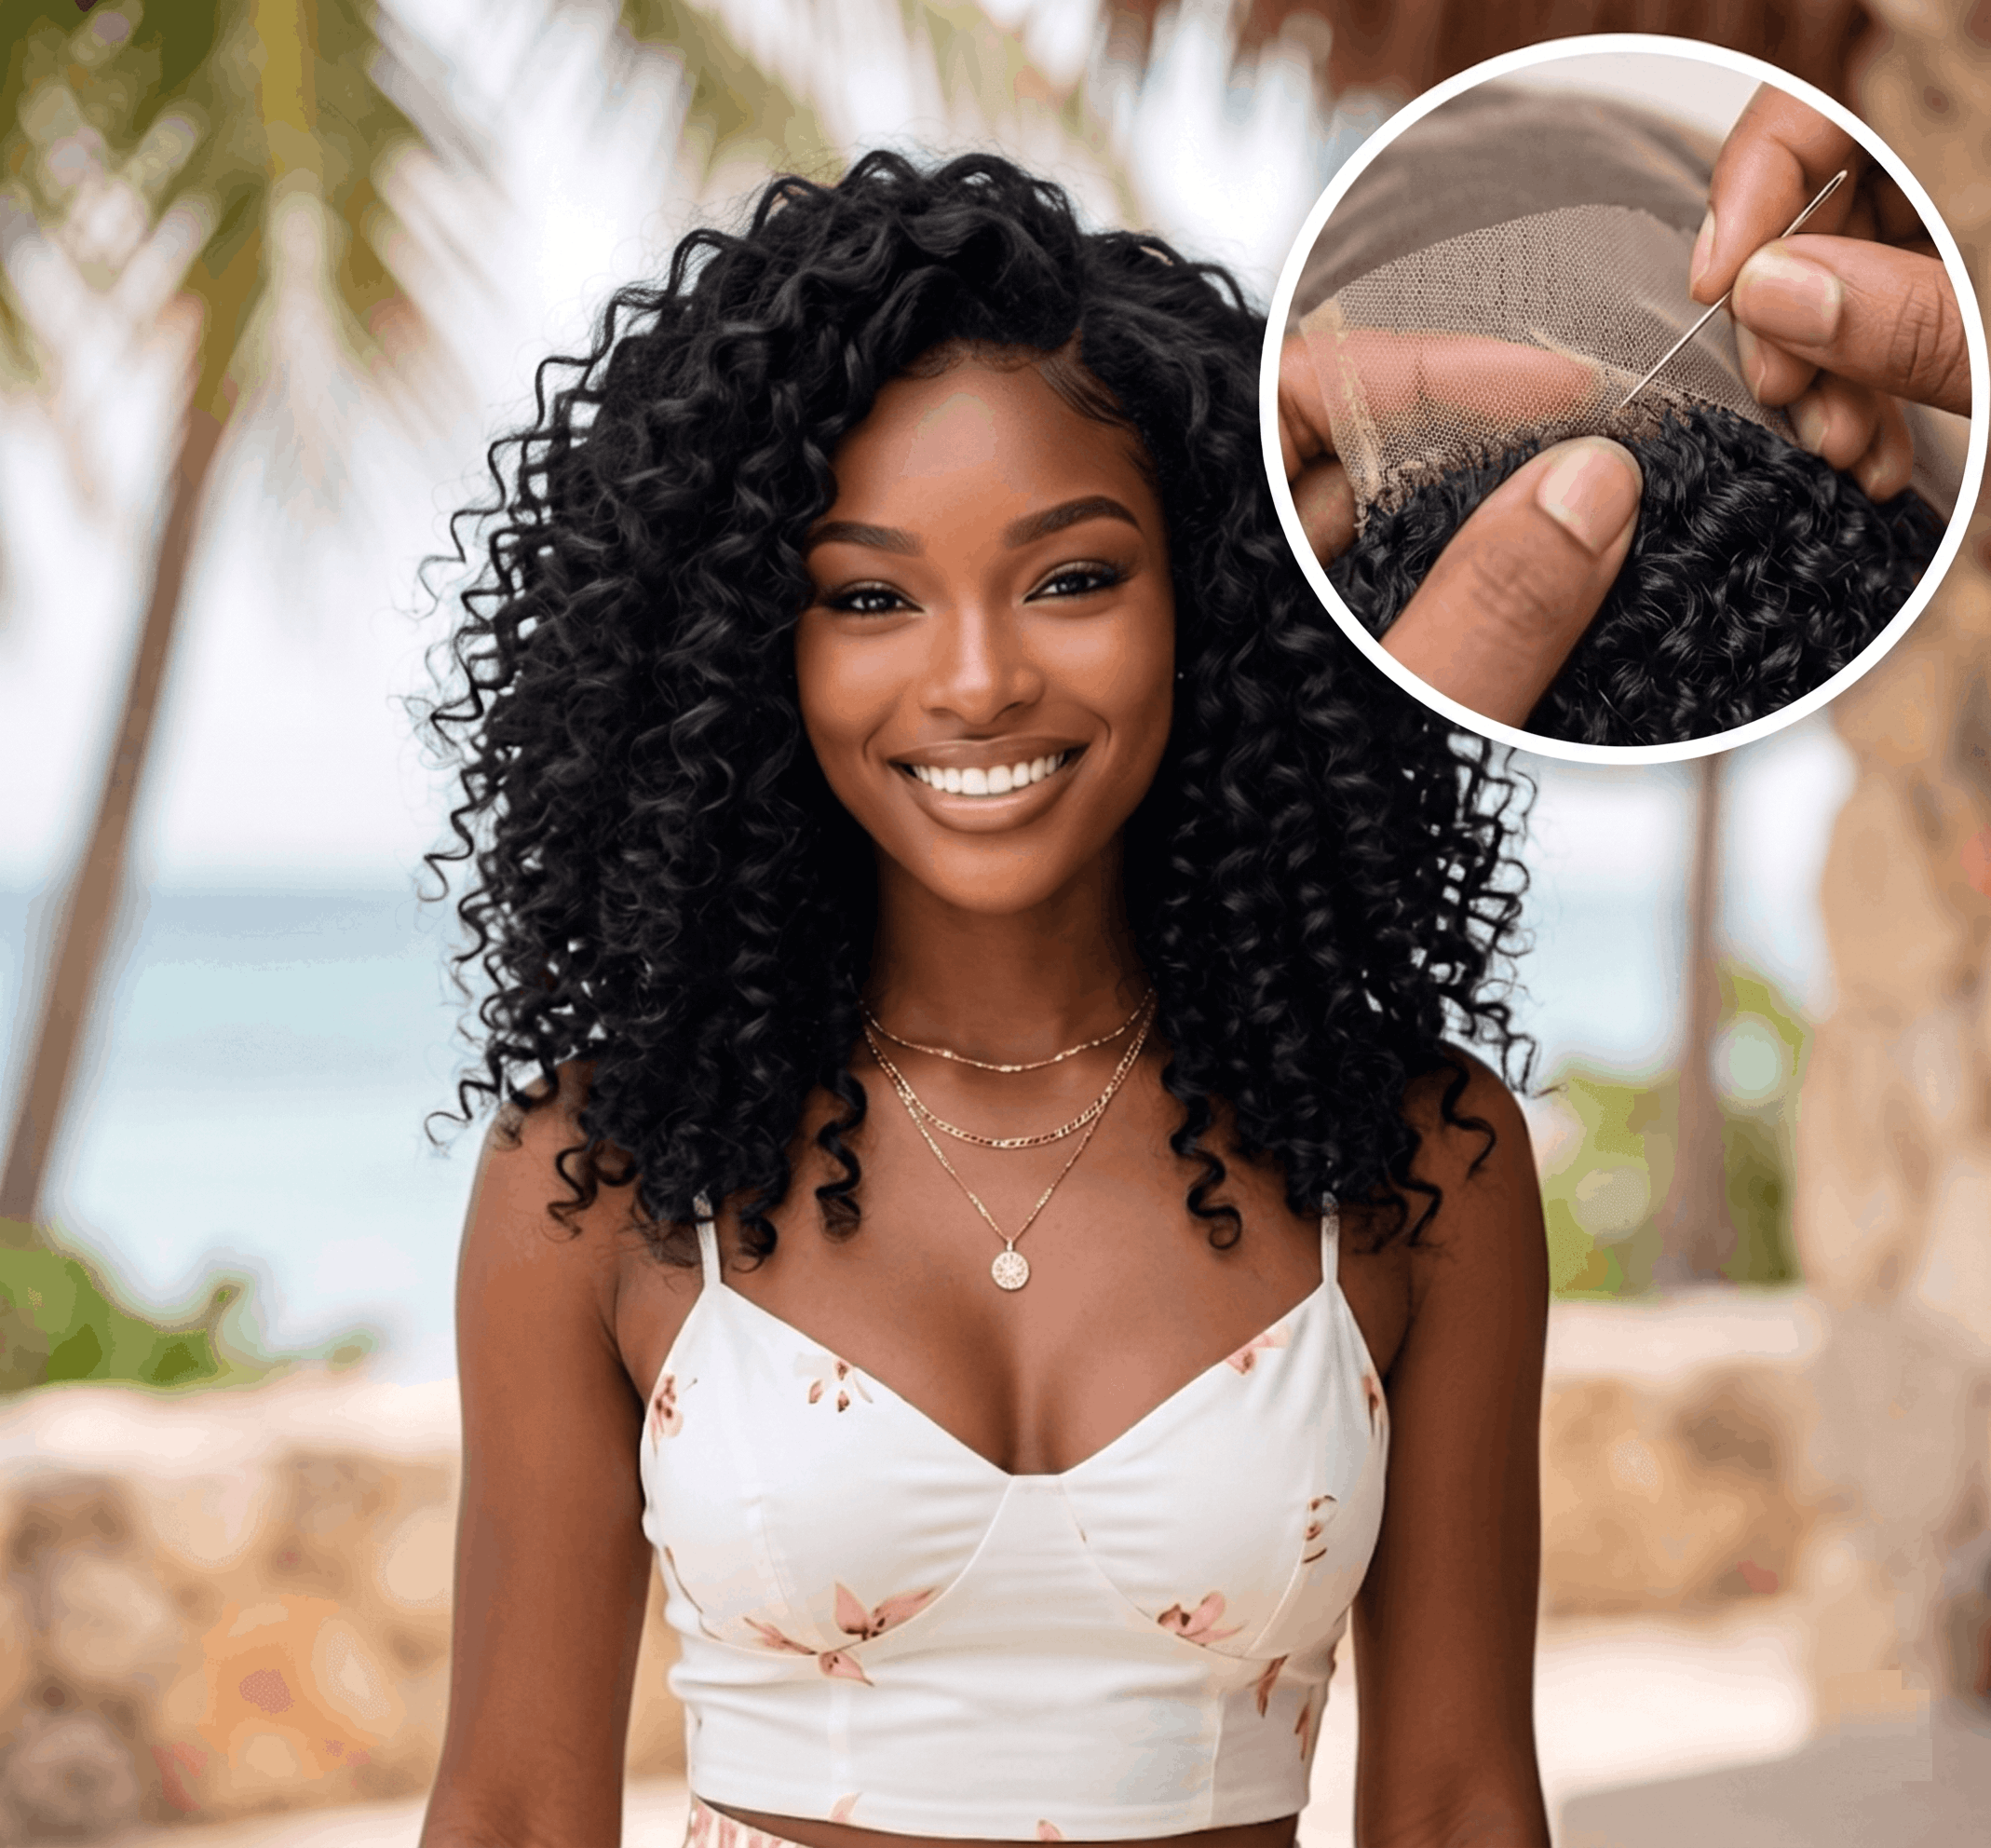
A high-quality lace closure is more than just hair attached to lace. The best closures use strong lace, healthy human hair, and careful construction so the final look appears natural and lasts longer. Virgin hair is especially preferred for its longevity and natural feel, while synthetic options are more affordable but less durable and less natural-looking.
Look for features like unidirectional cuticle alignment, a protein-rich cortex, strong tensile strength, non-acid-washed processing, and donor integrity. Real human hair outlasts synthetic and blended types, making it the best hair for lace closure sew-ins. In simple words, the hair should flow in one direction, feel strong, resist tangling, and keep its natural softness after washing. Thick bundles contribute to the overall fullness and natural appearance of the closure, making virgin human hair a high-quality investment for those seeking a fuller, more natural look.
Lace Closure Sew In Comparison Matrix
| Closure Type | Best For | Parting Space | Finish | Styling Notes |
|---|---|---|---|---|
| 4×4 Lace Closure | Simple middle or side parts | Medium | Natural | Great for beginners and classic sew ins |
| 5×5 Lace Closure | More parting room | Larger | Fuller scalp illusion | Good balance of coverage and ease |
| 6×6 Lace Closure | Wider parting and styling | Largest | Very natural | Best for flexible parting styles |
| HD Lace Closure | Seamless melt | Varies | Most invisible | Needs gentle handling because lace is delicate |
| Transparent Lace Closure | Light to medium lace tinting | Varies | Clean and bright | May need lace tint for deeper skin tones |
What Is The Best Lace Closure For A Sew In?
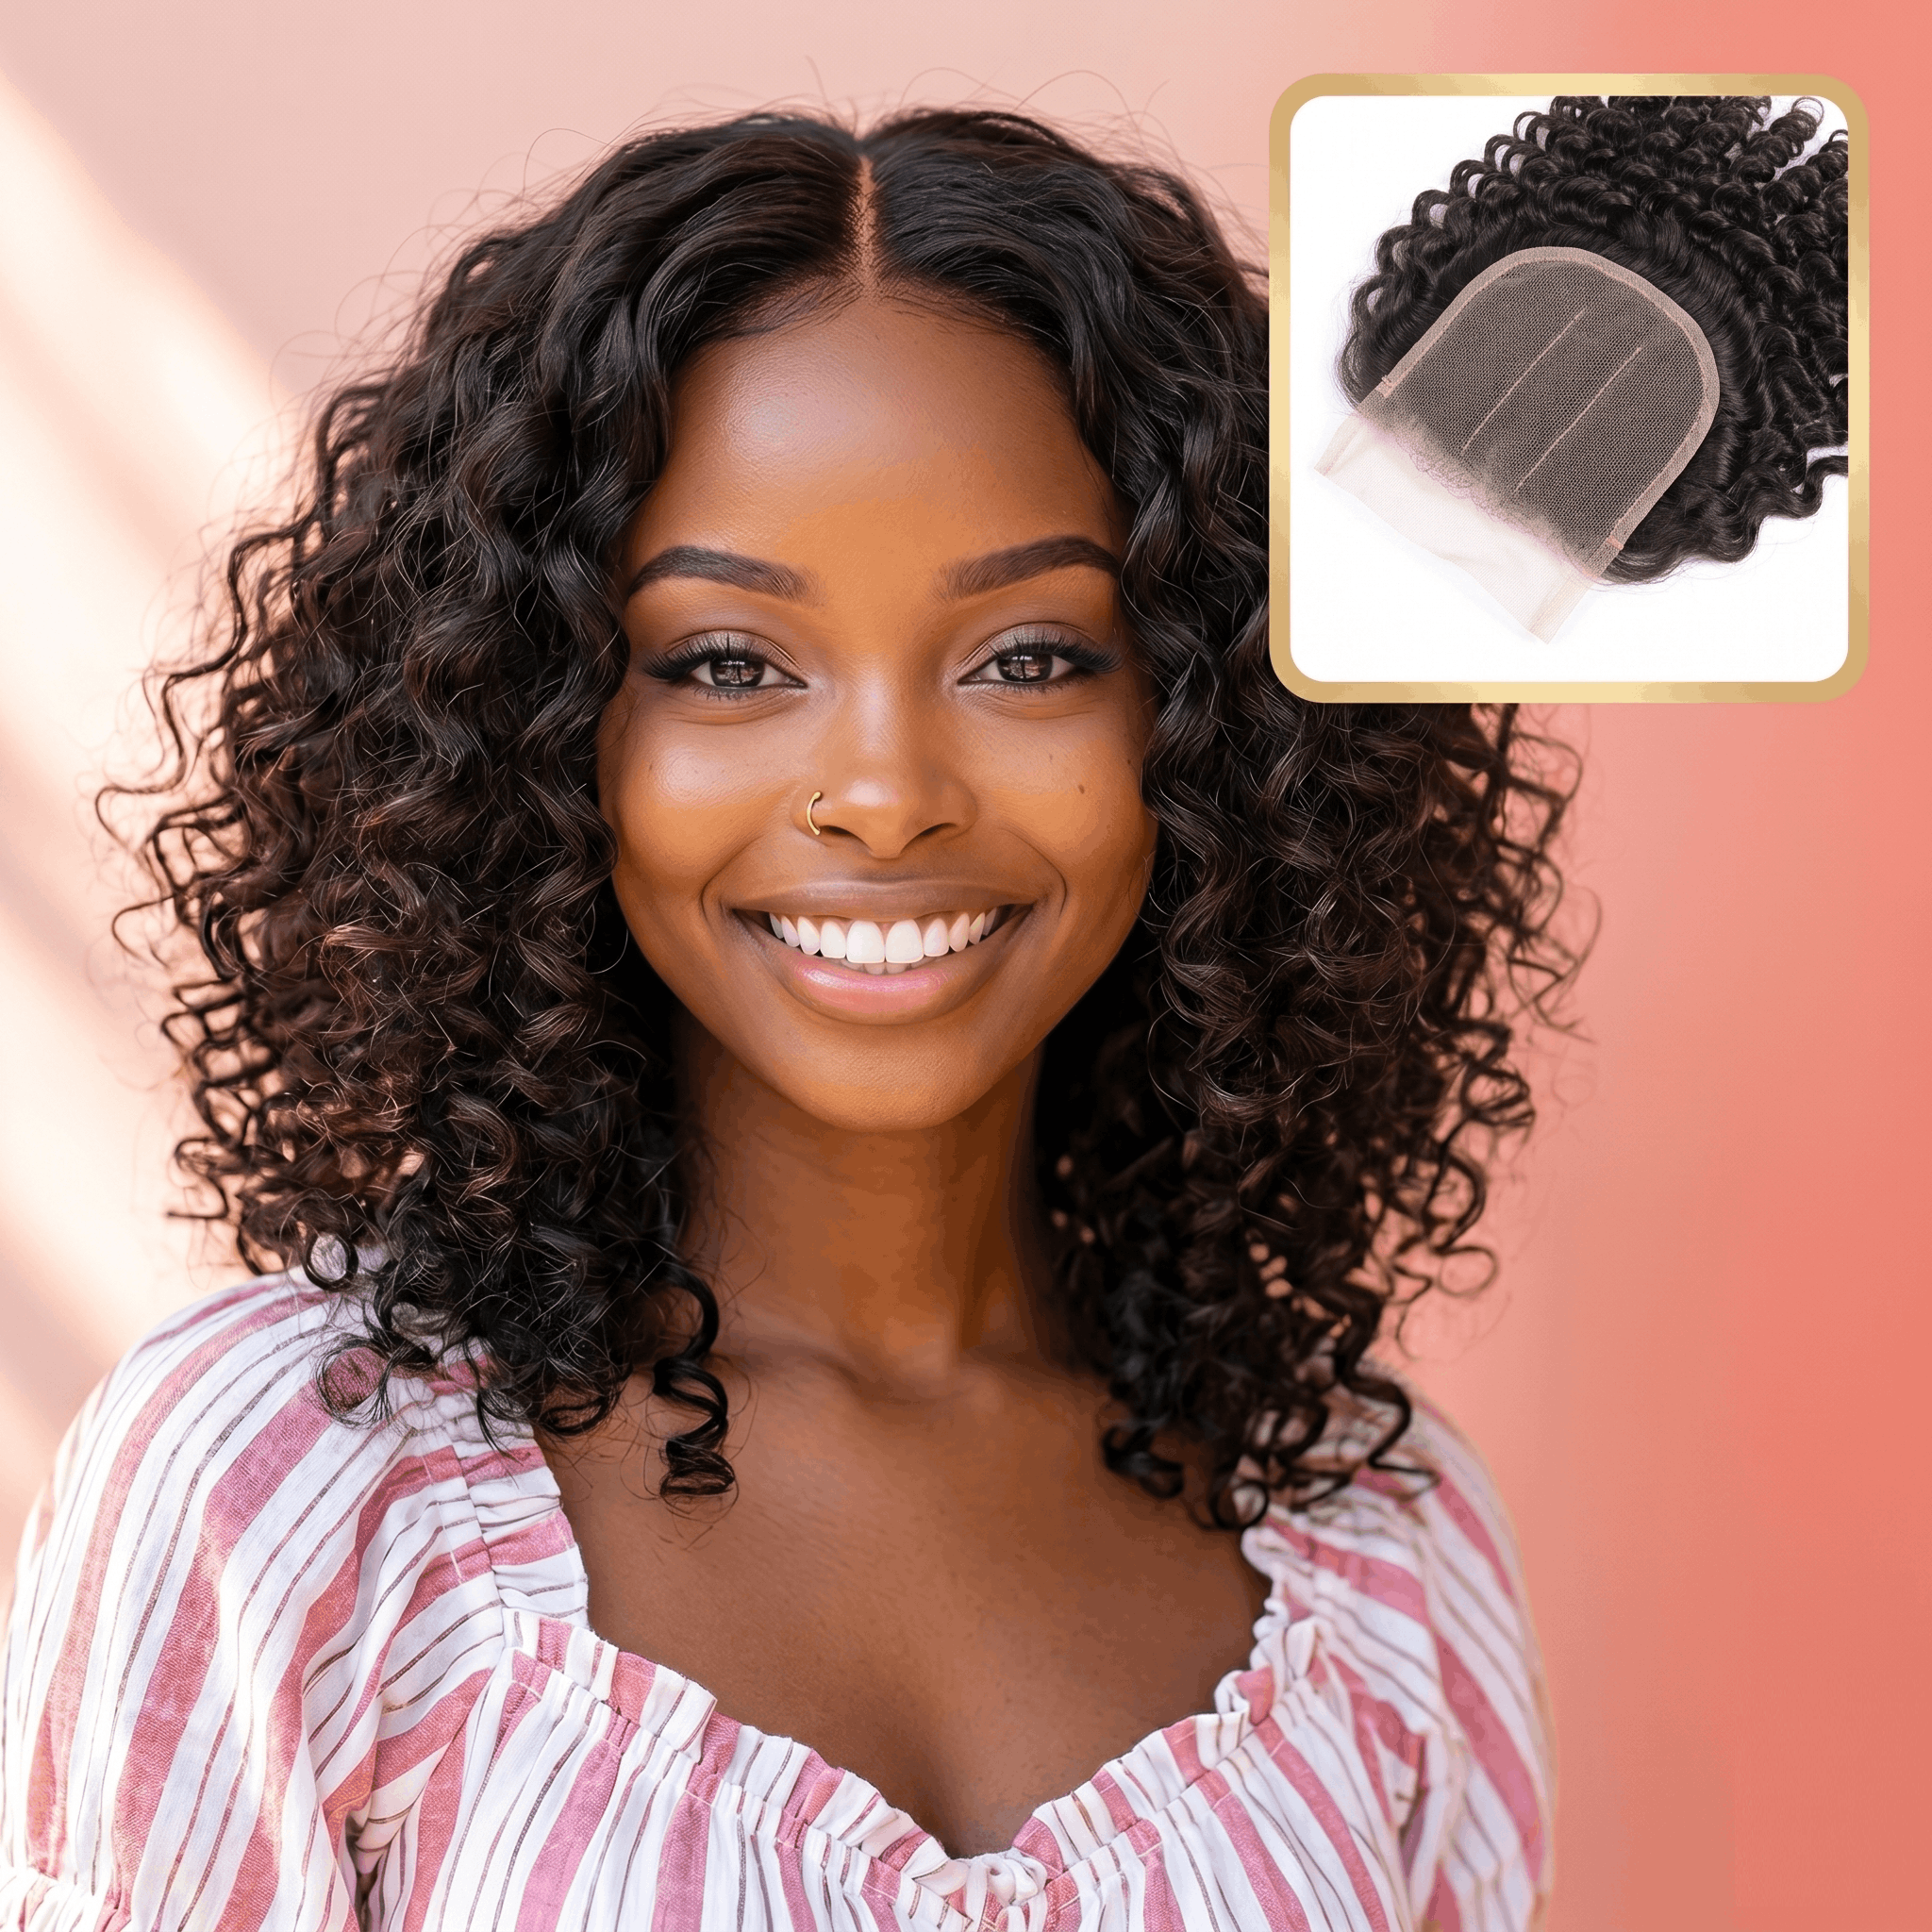
The best lace closure for a sew in depends on your desired parting space, lace tone, and hair texture. A 4×4 lace closure works well for simple looks, while 5×5 and 6×6 closures give more freedom for parting and styling.
For African American hair textures, Mink Brazilian and Indian hair are often chosen because they can blend beautifully with natural textures, especially when the curl pattern, color, and density match the bundles. These textures are known to closely match African American hair, providing a more seamless blend. The number of bundles you need depends on the desired fullness and length of your style, and some may prefer more or fewer bundles for their look.
For hair lengths between 16 to 22 inches, three bundles with a lace closure are recommended for optimal volume, while for lengths shorter than 14 inches, two bundles with a lace closure are generally adequate to achieve a natural look. For a seamless look, match your closure with your body wave bundles, straight bundles, deep wave bundles, or any texture you plan to install.
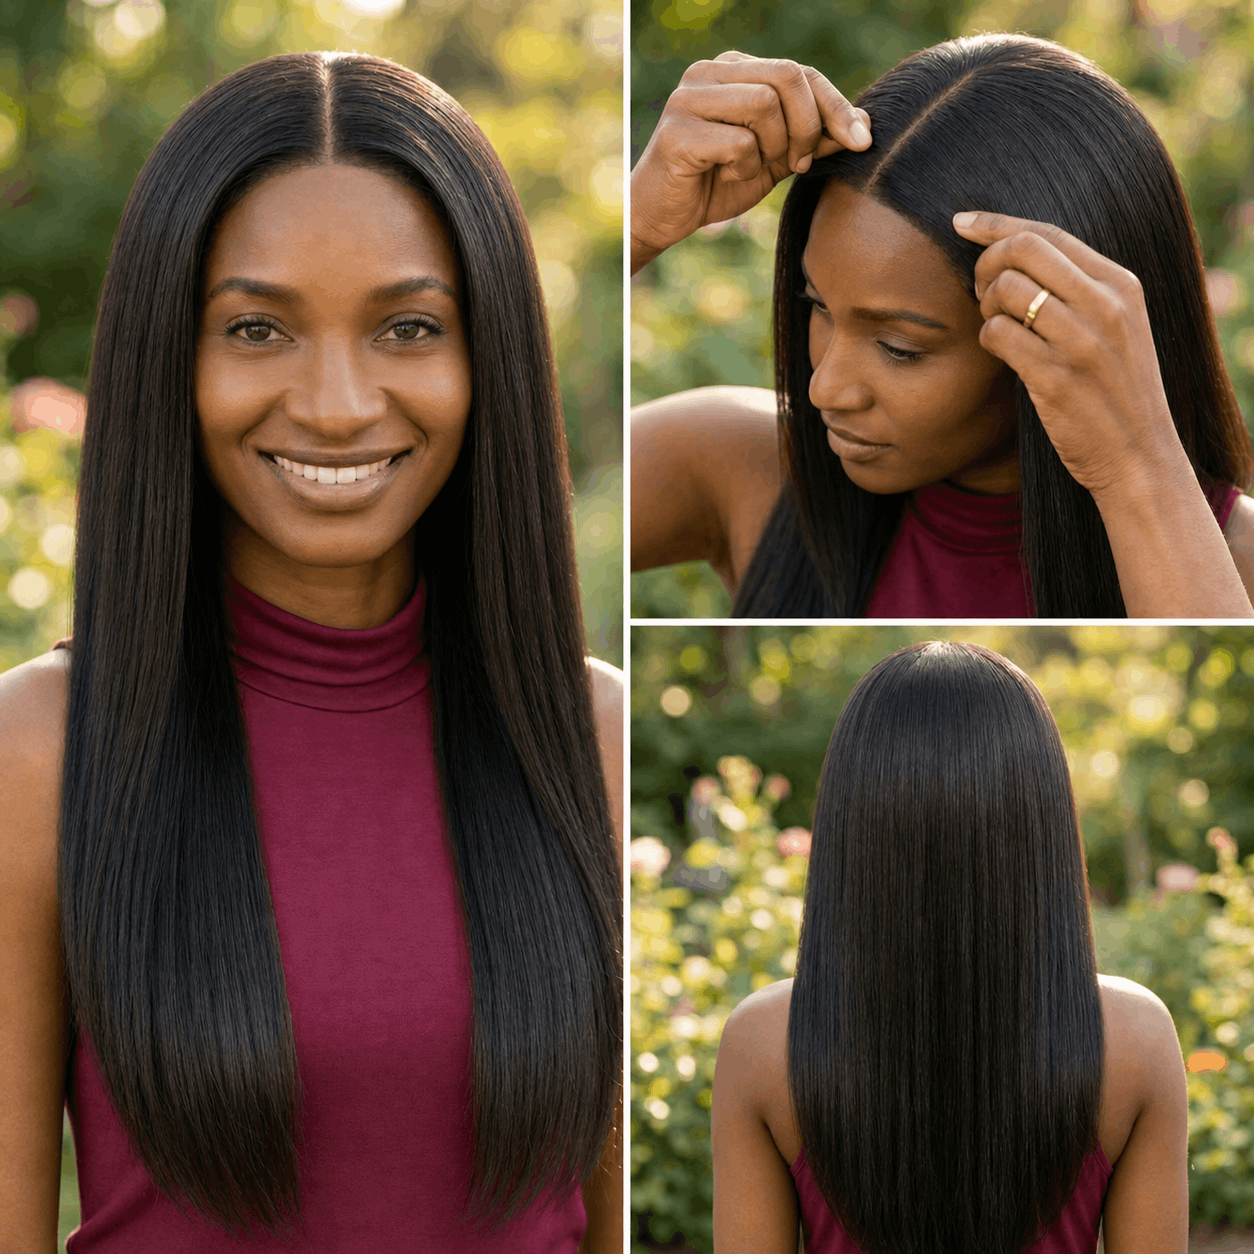
The most natural results usually come from matching lace tone, hair texture, density, and color before sewing begins.
Installation Guide

Start With Clean, Dry Hair
Wash and condition your natural hair first. Make sure it is completely dry before braiding to help protect scalp health and reduce odor, itching, and product buildup.
Create A Flat Cornrow Base
Braid natural hair into small, flat cornrows. Straight-back cornrows or a beehive braid pattern are common choices, depending on your parting style and head shape.
Protect The Foundation
Use a weaving net, wig cap, or mesh dome cap if needed. This can help support the sew in and reduce direct stress on your natural braids.
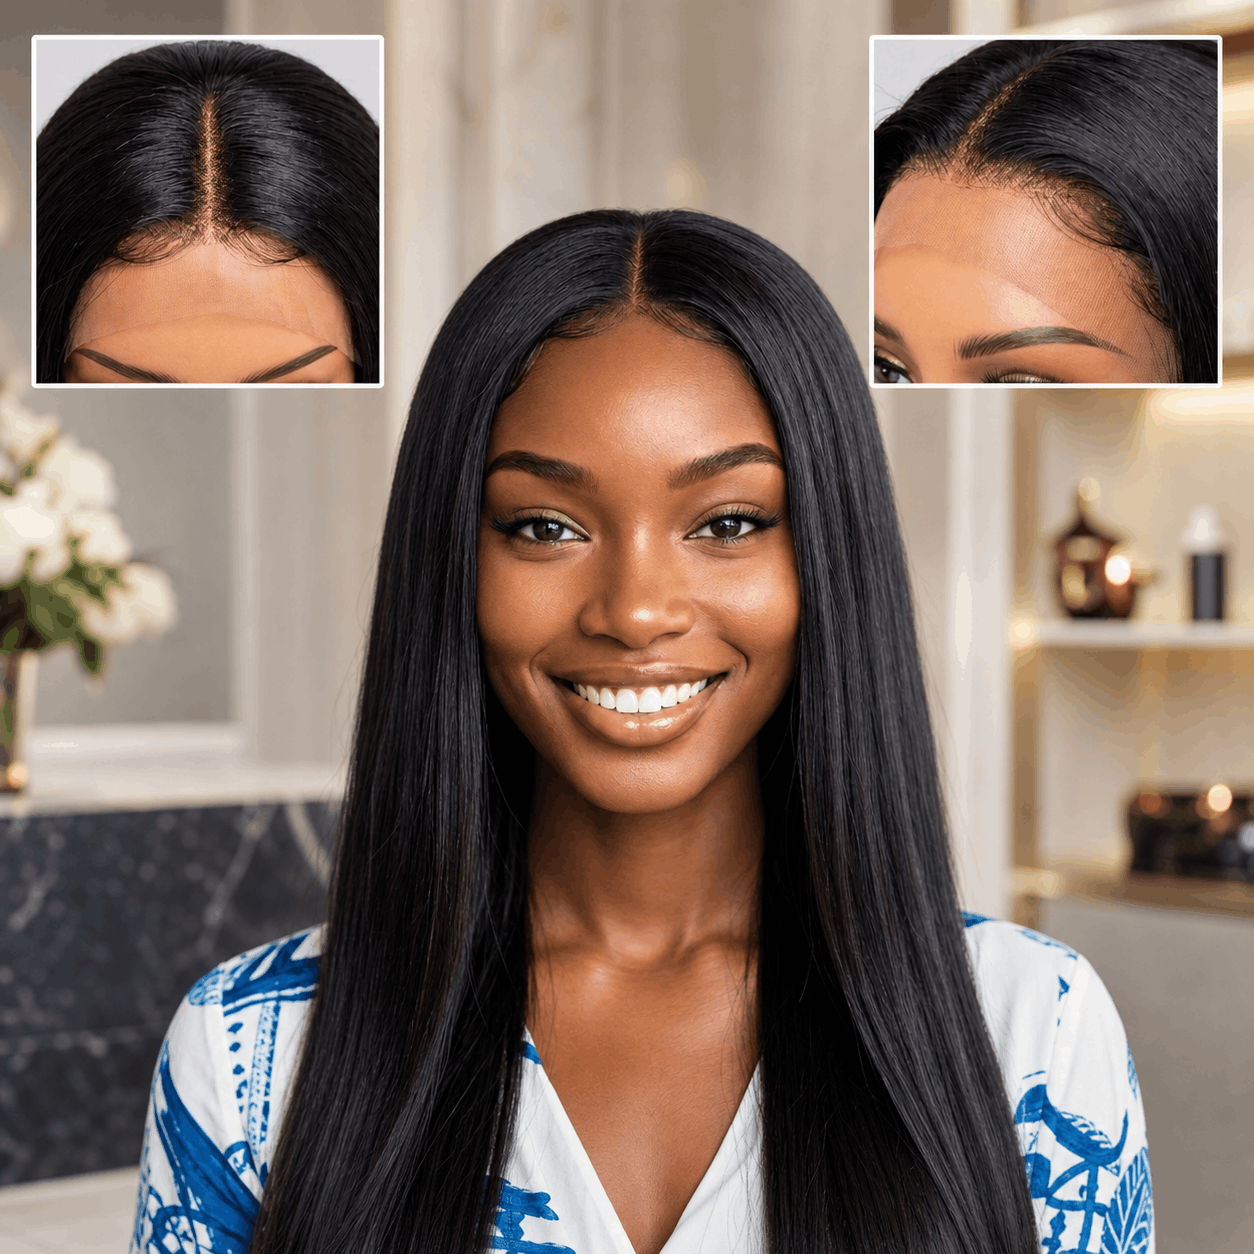
Position The Closure Correctly
Place the front edge of the closure about half an inch to one inch in front of the natural hairline. Use a pin, hairpin, T-pin, or temporary anchoring stitches to keep the lace centered and taut while you work.
Use The Right Thread And Needle
Nylon thread or weaving thread is commonly used because it is strong. A curved needle or weaving needle helps you sew close to the base with better control. Prepare your wefts (hair bundles) for sewing onto the foundation.
Sew With Even Tension
For better balance, some stylists use two needles at the same time. This can help maintain even tension and prevent one side from sitting higher than the other. Sew the wefts securely to the cornrow base.
Apply The Lock Stitch Method
Use small, tight stitches when sewing through the lace to ensure a secure attachment for the closure. Sew from the front edge of the closure to the braid anchor, gently pulling the lace taut so it lays smooth without buckling. Proper sewing helps prevent slipping of the closure or wefts.
Avoid Excessive Tension
Do not pull the lace too tightly. The closure should feel secure, not tight. Too much tension can rip the lace, buckle the install, or irritate the scalp.
Trim The Excess Lace
Use sharp scissors and cut the extra lace with a slight zigzag motion. This helps the lace blend more naturally instead of leaving a harsh straight line.
Blend And Style Gently
Apply lace tint, foundation powder, styling mousse, or light heat protectant as needed. When brushing your lace closure, start from the bottom and work upward to reduce stress on the hair. Avoid tugging or hard brushing, as this can cause shedding or damage to the closure.
Tip: At night, protect your style by tying the hair down with a silk or satin scarf or bonnet. This prevents tangling and helps maintain the closure and wefts. Tying your hair down at night also allows your natural hair to rest, promoting healthier hair growth and minimizing damage. Make sure your hair is dry before sleeping.
Frequently Asked Questions
What Is A Lace Closure Sew In?
A lace closure sew in is a protective style where a lace closure is sewn onto a braided base with bundles. It works because the closure creates a scalp-like finish without leaving natural hair out. Wealthy Hair recommends a flat braid pattern and texture-matched bundles for the most natural result.
What Is The Purpose Of A Lace Closure?
The purpose of a lace closure is to cover the top area of a sew in and create a natural part. It also protects your real hair from daily heat and styling stress. Wealthy Hair closures are designed to help create a polished, leave-out-free install.
What Is The Difference Between A Lace Closure And A Lace Frontal?
A lace closure covers a smaller top section of the head, while a lace frontal usually covers the full front hairline from ear to ear. The key difference is coverage and styling flexibility. Wealthy Hair recommends closures for lower-maintenance sew ins and lace fronts for wider hairline styling.
What Is The Best Lace Closure For A Sew In?
The best lace closure for a sew in is one that matches your skin tone, hair texture, density, and parting needs. A 4×4 closure is simple, while 5×5 and 6×6 closures offer more parting space. Wealthy Hair recommends choosing HD lace or properly tinted lace for a scalp-like finish.
What Is The Best Thread For Sewing In A Lace Closure?
The best thread for sewing in a lace closure is strong weaving thread or nylon thread. These threads hold the closure securely without needing oversized stitches. Wealthy Hair recommends small lock stitches for a flatter, longer-lasting install.
What Is The Best Braid Pattern For A Lace Closure Sew In?
The best braid pattern for a lace closure sew in is usually straight-back cornrows or a beehive pattern. These patterns create a flat foundation, which helps the closure lay smoothly. Wealthy Hair recommends small, neat cornrows with anchor braids around the closure area.
What Is The Difference Between HD Lace And Regular Lace Closure?
HD lace is thinner and blends more easily into the scalp, while regular lace is usually thicker and more durable. HD lace gives a more invisible look, but it must be handled gently. Wealthy Hair recommends HD lace for special seamless installs and regular lace for everyday durability.
What Is A 4×4 Lace Closure?
A 4×4 lace closure is a closure with about four inches of lace space across and back. It gives enough room for a natural middle or side part. Wealthy Hair recommends 4×4 closures for beginners or simple sew in styles.
What Is A 5×5 Lace Closure?
A 5×5 lace closure gives more lace space than a 4×4 closure. This allows more parting room and a fuller scalp illusion. Wealthy Hair recommends 5×5 closures when you want more flexibility without moving into frontal maintenance.
What Is A 6×6 Lace Closure?
A 6×6 lace closure has a wider lace area for deeper parting and more styling options. It creates a fuller, more open scalp look. Wealthy Hair recommends 6×6 closures for clients who want a more flexible but still protective sew in.
What Is A Protective Sew In With Closure?
A protective sew in with closure keeps your natural hair braided underneath and covered. This helps reduce daily manipulation, heat exposure, and breakage risk. Wealthy Hair recommends low-tension stitching and regular scalp care to keep the style protective.
What Is The Safest Way To Install A Lace Closure?
The safest method is to start with clean hair, create a flat braid base, and sew with gentle, even tension. This matters because tight installs can stress the scalp and hairline. Wealthy Hair recommends adjusting the install immediately if the lace feels painful, tight, or pinchy.
Tired of struggling to hide lace in your hair? Look no further! This guide will teach you the best techniques to camouflage lace and achieve a flawless hair style: Elevate Your Hair Style: How to Hide Lace and Enhance Your Look.
