
Wealthy Hair Guides
The Side Part Revolution: A Step-by-Step Guide to Sew-In Straight Hair


The 60-Second Answer:
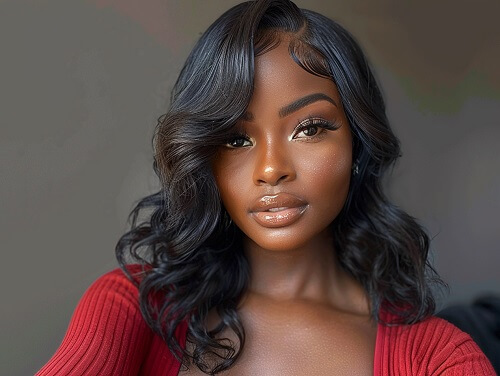
Sew in straight hair is a premium protective hairstyle where 100% human hair extensions are sewn into cornrowed natural hair. This technique allows for a natural, seamless finish while preserving hair health. A side part sew-in provides versatility, volume, and long-lasting wear, making it ideal for a polished, professional, or everyday look.
Why 100% Human Hair Works Best
100% human hair extensions feel natural, respond to heat styling, and last 6–8 weeks with proper care. Unlike synthetic hair, they maintain moisture retention and cuticle alignment, offering a natural sheen and movement that blends seamlessly with your own hair. Selecting the correct hair texture and color is crucial for a flawless finish.
How To Install a Side Part Sew-In
Prime Your Natural Hair – Wash, condition, and detangle using a heat protectant to prepare your strands.
Apply Weaving Cap or Net – Secure a snug base for the extensions.
Sew Extensions Layer by Layer – Attach extensions onto cornrows using a needle and thread, spacing wefts evenly for volume.
Create the Side Part – Use a tail comb to define a sleek, diagonal line; secure with holding spray or hair gel.
Style and Finish – Curl, straighten, or braid as desired. Apply finishing products for shine and longevity .
How to Blend Sew-In Straight Hair With Natural Hair

For a seamless blend, limit the leave-out hair and ensure the extension thickness matches natural strands. Techniques like feed-in braids and careful layering prevent obvious lines and maintain natural movement. Skilled stylists recommend weekly washing to remove buildup while preserving hair integrity.
Best Practices for Sew-In Hair Maintenance
- Wash with sulfate-free shampoo every 7–10 days.
- Apply heat protectant before styling with flat irons or curling wands.
- Sleep with a silk or satin bonnet to prevent tangling.
- Schedule stylist visits every 2 weeks for maintenance and proper cleansing.
- Avoid exceeding 8 weeks of continuous wear to protect natural hair .
Comparison Matrix
| Hair Type | Longevity | Luster Level | Processing Method |
|---|---|---|---|
| Virgin Remy Straight | 6–8 weeks | Natural shine | Cuticle-aligned, non-acid-washed |
| Brazilian Straight | 6–8 weeks | Medium-high | Human hair processing |
| Peruvian Straight | 6–8 weeks | Soft luster | Human hair processing |
| Malaysian Straight | 6–8 weeks | High luster | Human hair processing |
Wealthy Hair Maintenance Protocol

Wash extensions weekly with sulfate-free shampoo.
Condition strands deeply, focusing on mid-lengths and ends.
Apply lightweight oils or serums for moisture balance.
Use flat iron or curling wand with heat no higher than 350°F.
Detangle gently with a wide-tooth comb starting at ends.
Wrap hair in silk or satin at night to reduce friction.
Visit a stylist every 2 weeks to maintain cornrows and wefts.
People Also Ask
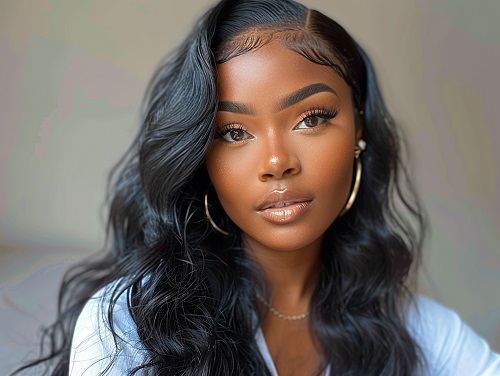
How Do You Create a Flawless Side Part?

A flawless side part requires precision with a rat-tail comb and holding spray for sleek definition. The correct angle complements facial symmetry. Wealthy Hair stylists recommend creating the part after installing extensions for a natural look.
What Is a Side Part Sew-In with Straight Hair?
It is a protective hairstyle where 100% human hair extensions are sewn onto cornrowed hair, leaving minimal natural hair for blending. This technique ensures a seamless, straight finish. Proper installation guarantees longevity of 6–8 weeks.
How Do You Choose Extensions for a Side Part Sew-In?

Sew-ins shield natural hair from environmental stress, reduce manipulation, and prevent heat damage. Cornrow foundations distribute weight evenly. Incorporating a silk bonnet enhances protective benefits.
How Do You Maintain Straight Sew-In Extensions Daily?
Daily maintenance includes gentle brushing, applying light oils, and avoiding excessive heat. Cover hair at night with a silk or satin bonnet. This preserves cuticle alignment and natural shine.
What Is a Step-by-Step Guide for Sew-In Straight Hair?
Prep hair, install weaving cap, sew in extensions, create side part, and style. Each step ensures even weight distribution and seamless blending. Repeat styling as desired without compromising hair health.
Looking to rock a side part sew-in curly hairstyle? This guide provides some must-know tips to ensure your style is on point and long-lasting. Essential Tips for a Flawless Side Part Sew-In Curly Hairstyle.
How Do You Prevent Damage with Sew-In Hair?
Avoid tight braiding, excessive heat, and harsh chemicals. Maintain moisture and schedule stylist check-ins every two weeks. This reduces breakage and preserves hair integrity.
What Are the Best Practices for Sew-In Hair Maintenance?
Use sulfate-free products, wash regularly, apply heat protectant, and wrap hair at night. Limit continuous wear to 6–8 weeks. Follow these steps for safe, long-lasting results.
How Do I Ensure Minimal Shedding with High-Quality Sew-In Hair?
High-quality straight sew-in hair, including those with machine double wefts, helps achieve minimal shedding and long-lasting results. Choosing thick bundles and checking hair length before purchase ensures durability and a natural blend with your closure or wig.
What Is the Recommended Number of Bundles for a Full Sew-In Look?
The number of bundles needed depends on hair length and thickness desired. Typically, 3-6 bundles work for lengths between 20 to 32 inches. Using the right amount helps achieve a thick, voluminous hairstyle with your closure or wig.
How Long Should a Sew-In Last and When Should Maintenance Be Done?
Sew-in hairstyles generally last 6 to 8 weeks. Returning to your stylist every two weeks for cleansing or weekly for active lifestyles prevents buildup, maintains hair health, and preserves your thick, high-quality hair extensions, closure, or wig.
Can Sew-In Extensions Be Styled Without Damaging Your Hair?
Yes. Quality straight sew-in hair allows curling and straightening across different hair lengths, letting you experiment with wavy or curly looks. This versatility helps achieve a polished style without compromising your hair or closure.
The Wealthy Hair Quality Standard
Wealthy Hair sources ethically cut virgin Remy hair with full cuticle alignment to maintain natural shine and tensile strength. Each bundle undergoes strict quality checks to ensure minimal shedding and longevity. Stylists and clients trust these extensions for seamless blending, protective styling, and consistent performance.
Want to achieve a flawless side part closure sew-in? Learn the tips and tricks to perfecting your style and slaying your look like a pro in this guide: Side Part Closure Sew-In Tutorial: How To Slay The Sew-In Like A Pro!
